The Double L Observatory
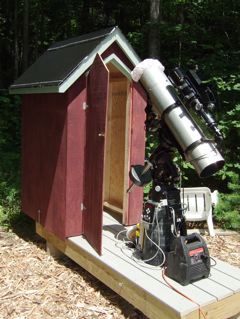
This is my roll-off design. The whole thing cost me about $200 and a few afternoons to build.Its basically a deck made of recycled plastic decking with a small house mounted on casters that roll along this deck. The house frame is all 2 x 4's and the sheathing is T-111 plywood. The roof is sheathed in surplus foundation wrap that a buddy donated.

Double L Closed
Double L Open
The castors are cheap ones from McMaster Carr, and I use a barrel bolt that drops into a hole in the deck to keep the house from rolling off the deck when its open.
I poured the corners of the deck in shallow piers that will surely float during the winter, but I can relevel the deck by shimming the 2x6 joists up and re-tightening the corner bolts that are let into the piers.
If I had it to do over again, I'd have made the edge boards on the deck a few feet longer to get the house farther away from the pier, and build the deck part just under the house when it's closed. There's no real need for the extra deck behind the closed house except for the two outside rails that the casters roll on. I'd also redesign the door so that it could open all the way and not hit the overhanging roof trim.
Pouring the Pier
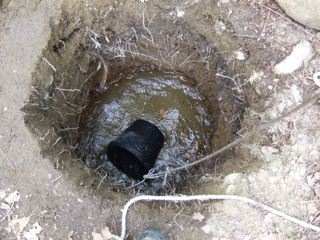
High Water Table
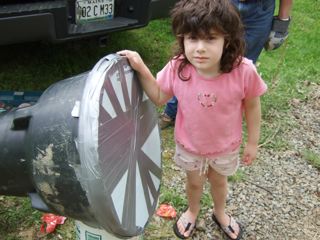
Lyra Demonstrating the Water Barrier
It didn't take long to see that I'd dug a well, not a telescope pier hole! I had to bail the hole out every few minutes or so while I was digging, and when I came out the morning after the excavation was complete, there was beautiful cool, clear water just a foot below the top of the hole. I was wondering how I was going to keep the water out of the pier form when I hit upon the simple idea of stuffing a piece of foamboard in the bottom of the plastic pier form, as my daughter Lyra (one of the L's in the observatory name--the other is her brother Leo)
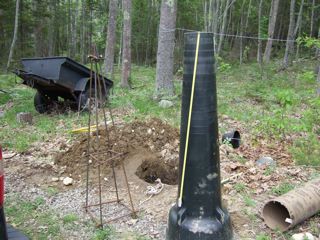
Just About to Pour
I ended up using a plastic form called a "Pier Tube" that is footing and column form all in one. A bit pricey, but really nice compared to sonotube for a few reasons. It is a bit dressier above the surface and is tapered from the bottom to keep the ice from getting a bite. It also hides any imperfections in the concrete pour.
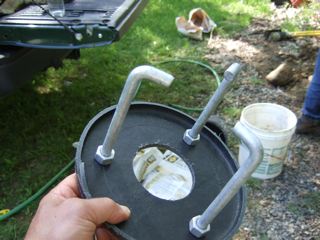
Mount Anchors
It's also handy for locating the bolts for the mounting plate for the equatorial head. You can cut the top of the plastic form off, drill holes for the bolts and a big hole for the concrete to be poured in, attach the bolts, and then tape the whole thing back on to the top of the form to finish the pour. That way you don't have to struggle to push the bolts into the concrete, you just pour around them.
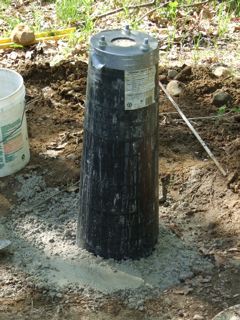
The Finished Pier
A little rebar, six bags of concrete mix, and presto! you've got yourself a pier. So far it's proven to be really rugged and does not vibrate in the least. You can whack on it all you want while imaging and it doesn't move a millimeter.
Happy digging!